라디오 앱 유저들이 홈 화면에서 라디오를 컨트롤 할 수 있는 위젯을 만들어 달라는 요청이 있어서 이번 기회에 위젯에 관련된 내용들을 정리하고자 한다.
1. 위젯 유형
위젯을 만들때 어떤 종류의 위젯을 만들지 생각해봐야 한다.
크게 위젯은 네가지로 분류할 수 있다.
- 정보 위젯
일반적으로 정보 위젯은 사용자에게 시간에 따른 정보를 알려줄 때 사용한다.
보통 해당 위젯을 터치했을 때 연결된 앱으로 이동된다.
대표적인 정보 위젯은 시계 위젯, 날씨 위젯이다.

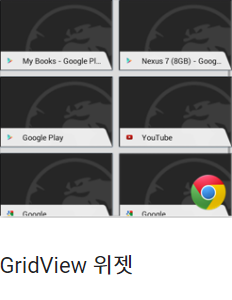
- 컬렉션 위젯
컬렉션 위젯은 동일한 유형의 여러 요소를 표시한다. 보통 컬렉션의 요소들을 사용하기 위해 세부 정보 뷰로 열기 기능을 포함하고 세로로 스크롤할 수 있다.

- 관리 위젯
관리 위젯의 기본 목적은 사용자가 앱을 먼저 열 필요 없이 홈 화면에서 바로 트리거할 수 있는 함수를 표시하는 것이다.
관리 위젯의 일반적인 예는 사용자가 실제 음악 앱 외부에서 음악 트랙을 재생, 일시중지 또는 건너뛸 수 있는 음악 앱 위젯이다.
- 하이브리드 위젯
다양한 유형의 요소를 결합한 위젯이다. 음악 플레이어 위젯은 기본적으로 관리 위젯이라고 볼 수 있지만 현재 재생중인 노래 제목과 같이 정보를 알려주어야 하는 경우 관리 위젯 + 정보 위젯의 성격을 가지고 있다.
따라서 라디오 플레이어 위젯은 하이브리드 위젯이라고 볼 수 있다.

2. 위젯 제한사항
위젯은 홈 화면에서 사용하기 때문에 디자인과 기능에 대한 제약이 있다.
- 기능 제한
위젯에 사용할 수 있는 유일한 기능은 터치 및 수직 스와이프이다. 가로 스와이프 같은 경우 홈 화면에서 이미 사용하고 있기 때문에 막아놓은 것으로 보인다.
- 레이아웃 제한
안드로이드 위젯은 RemoteViews 객체를 기반으로 하기 때문에 사용할 수 있는 뷰 객체들이 제한되어 있다.
사용할 수 있는 뷰 객체들은 다음과 같다.
- FrameLayout
- LinearLayout
- RelativeLayout
- GridLayout
- AnalogClock
- Button
- Chronometer
- ImageButton
- ImageView
- ProgressBar
- TextView
- ViewFlipper
- ListView
- GridView
- StackView
- AdapterViewFlipper
3. 위젯 만들기
- 매니페스트에 AppWidgetProvider 등록
AppWidgetProvider는 위젯과 앱이 상호 작용 할 수 있게 도와주는 클래스이다. BroadCastReceiver를 상속 받았기 때문에 onReceive 함수에서 Action에 따른 기능 분할 처리가 가능하다.
그 외에도 onUpdate, onAppWidgetOptionsChanged, onDeleted, onDisabled, onRestored 함수를 오버라이딩할 수 있는데 자세한 내용은 https://developer.android.com/guide/topics/appwidgets?hl=en#ProviderBroadcasts 에서 확인하면 된다.
        <receiver android:name=".ExampleAppWidgetProvider">
            <intent-filter>
                <action android:name="android.appwidget.action.APPWIDGET_UPDATE" />
            </intent-filter>

            <meta-data
                android:name="android.appwidget.provider"
                android:resource="@xml/example_appwidget_info" />
        </receiver>
example_appwidget_info 파일은 앱 위젯의 기본 설정을 위한 파일이다.
<?xml version="1.0" encoding="utf-8"?>
<appwidget-provider xmlns:android="http://schemas.android.com/apk/res/android"
    android:minWidth="300dp"
    android:minHeight="60dp"
    android:updatePeriodMillis="86400000"
    android:previewImage="@drawable/ic_launcher_foreground"
    android:initialLayout="@layout/layout_widget"
    android:resizeMode="horizontal|vertical"
    android:widgetCategory="home_screen">
</appwidget-provider>
- Widget 레이아웃 만들기 (R.layout.layout_widget)
제한된 뷰 객체를 사용하지 않게 주의하자.
<?xml version="1.0" encoding="utf-8"?>
<LinearLayout android:id="@+id/llRoot"
    xmlns:android="http://schemas.android.com/apk/res/android"
    xmlns:tools="http://schemas.android.com/tools"
    android:layout_width="match_parent"
    android:layout_height="wrap_content"
    android:padding="8dp"
    android:orientation="horizontal"
    android:background="@color/black"
    >

    <ImageView android:id="@+id/ivIcon"
        android:layout_width="50dp"
        android:layout_height="50dp"
        android:src="@mipmap/ic_launcher"
        android:layout_gravity="center_vertical"
        />

    <LinearLayout
        android:layout_width="0dp"
        android:layout_height="wrap_content"
        android:orientation="vertical"
        android:layout_weight="1"
        android:layout_marginStart="8dp"
        android:layout_marginEnd="8dp"
        >

        <TextView android:id="@+id/tvTitle"
            android:layout_width="match_parent"
            android:layout_height="wrap_content"
            android:textSize="16dp"
            android:textColor="#ffffff"
            tools:text="제목입니다"
            />

        <TextView android:id="@+id/tvSubTitle"
            android:layout_width="match_parent"
            android:layout_height="wrap_content"
            android:textSize="14dp"
            android:textColor="#ffffff"
            tools:text="현재 재생중인 곡입니다."
            />

        <FrameLayout
            android:layout_width="match_parent"
            android:layout_height="wrap_content"
            android:layout_gravity="center_vertical"
            >

            <ImageView android:id="@+id/ivPrev"
                android:layout_width="32dp"
                android:layout_height="32dp"
                android:layout_marginTop="5dp"
                android:layout_marginBottom="5dp"
                android:layout_marginStart="16dp"
                android:layout_marginEnd="8dp"
                android:background="@drawable/ic_prev"
                android:layout_gravity="start|center_vertical"
                />

            <ImageView android:id="@+id/ivPlay"
                android:layout_width="32dp"
                android:layout_height="32dp"
                android:layout_marginTop="5dp"
                android:layout_marginBottom="5dp"
                android:layout_marginStart="8dp"
                android:background="@drawable/ic_notification_play"
                android:layout_gravity="center"
                />
            <ImageView android:id="@+id/ivNext"
                android:layout_width="32dp"
                android:layout_height="32dp"
                android:layout_marginTop="5dp"
                android:layout_marginBottom="5dp"
                android:layout_marginStart="16dp"
                android:layout_marginEnd="8dp"
                android:background="@drawable/ic_next"
                android:layout_gravity="end|center_vertical"
                />

        </FrameLayout>
    </LinearLayout>
</LinearLayout>
- AppWidgetProvider 만들기
RemoteViews를 사용해봤다면 어렵지 않은 코드이다.
커스텀 액션을 상수로 만들어 이전 곡 재생, 현재 곡 재생, 다음 곡 재생 버튼을 등록해주었다.
class ExampleAppWidgetProvider : AppWidgetProvider()
{
    private val ACTION_BTN_PREV: String = ExampleAppWidgetProvider::class.java.getPackage().name + ".BTN_PREV"
    private val ACTION_BTN_PLAY: String = ExampleAppWidgetProvider::class.java.getPackage().name + ".BTN_PLAY"
    private val ACTION_BTN_NEXT: String = ExampleAppWidgetProvider::class.java.getPackage().name + ".BTN_NEXT"

    override fun onReceive(context: Context, intent: Intent)
    {
        super.onReceive(context, intent)
        Toast.makeText(context, intent.action, Toast.LENGTH_SHORT).show()
    }

    override fun onUpdate(
        context: Context,
        appWidgetManager: AppWidgetManager,
        appWidgetIds: IntArray
    ) {
        val widget = ComponentName(context, ExampleAppWidgetProvider::class.java)
        appWidgetIds.forEach {
            val views : RemoteViews = RemoteViews(context.packageName, R.layout.layout_widget)

            val pendingIntent = Intent(context, MainActivity::class.java).let {
                PendingIntent.getActivity(context, 0, it, 0)
            }
            views.setOnClickPendingIntent(R.id.llRoot, pendingIntent)

            views.setOnClickPendingIntent(R.id.ivPrev, getCustomActPedingIntent(context, ACTION_BTN_PREV))
            views.setOnClickPendingIntent(R.id.ivPlay, getCustomActPedingIntent(context, ACTION_BTN_PLAY))
            views.setOnClickPendingIntent(R.id.ivNext, getCustomActPedingIntent(context, ACTION_BTN_NEXT))

            views.setTextViewText(R.id.tvTitle, "임시 타이틀")
            views.setTextViewText(R.id.tvSubTitle, "임시 서브 타이틀")
            views.setImageViewResource(R.id.ivIcon, R.mipmap.ic_launcher)

            appWidgetManager.updateAppWidget(widget, views)
        }
    }

    override fun onAppWidgetOptionsChanged(
        context: Context?,
        appWidgetManager: AppWidgetManager?,
        appWidgetId: Int,
        newOptions: Bundle?
    ) {
        super.onAppWidgetOptionsChanged(context, appWidgetManager, appWidgetId, newOptions)
    }

    override fun onDeleted(context: Context?, appWidgetIds: IntArray?)
    {
        super.onDeleted(context, appWidgetIds)
    }
    override fun onDisabled(context: Context?)
    {
        super.onDisabled(context)
    }

    override fun onRestored(context: Context?, oldWidgetIds: IntArray?, newWidgetIds: IntArray?)
    {
        super.onRestored(context, oldWidgetIds, newWidgetIds)
    }

    private fun getCustomActPedingIntent(context: Context, customAction: String): PendingIntent
    {
        val intent = Intent(context, javaClass).apply {
            action = customAction
        }
        return PendingIntent.getBroadcast(context, 0, intent, 0)
    }
}
4. 결과 확인
재생 버튼을 눌렀을 때 커스텀 액션이 노출되는 것을 확인할 수 있다.

'OS > Android' 카테고리의 다른 글
| 원스토어 배포 이슈 (0) | 2022.11.29 |
|---|---|
| Android Media Button 대응 (0) | 2022.01.12 |
| Android Bundle(.aab) release crash 삽질 (0) | 2021.08.27 |
| 삼성폰 HLS 재생 안됨 디버깅 (0) | 2021.06.07 |
| 안드로이드 패턴.. 어떤걸 쓰지?? (0) | 2021.05.25 |
